When I first started thinking through what equipment was needed to create a video studio, it was a little overwhelming. There are a dozen categories of items to consider, hundreds of items in each category, and a thousand brands of all these things to choose from. So, after six weeks of research and testing out a variety of options while building my first DIY video studio, I wanted to document what I learned in this post.
What equipment do you need for your DIY video studio?
- Video camera or smartphone
- Tripod
- Microphone
- Lights
What equipment is nice-to-have for your DIY video studio?
- Sound dampening devices and other miscellaneous acoustic treatments
- Video monitor
- Camera & Light mounts
- Camera remote
- Audio Recorder
- Dimmer switches
- Colored Gels
- Set furniture & decor
- Extra lights
I consider this to be a short list because there is a wide variety of camera and lighting odd and ends that could be useful for your studio. Still, let’s take a moment to evaluate each of the items mentioned above in detail to see why it makes the needed or nice-to-have list.
Studio Equipment You Need
Without this gear, you will be out of luck with your studio—even if you have a camera. You really need the other three pieces to ensure you are going to get to that “studio quality” level in your videos.
Video camera or smartphone
This is the obvious one and a dozen separate blog posts could be written about the types of cameras and lenses to consider for your studio. Those will come later, so stay tuned. If you want to know what I am using, I regularly update this page with my top camera and lens recommendations.
For now, it’s important to know that you can get started with your smartphone if you need to. This is especially convenient if you want to make simple videos for social media. Still, better equipment does yield better results, so it depends on your budget, skill level, and desired quality level.
Microphone
Almost every video camera from your smartphone to your DSLR has a built-in microphone. The problem is that none of these built-in microphones produce good quality audio. They are really there as a last resort or something you can use to sync up to other audio sources to later.
To get better quality audio you will need to purchase a separate microphone in to plug into your camera or a separate audio mixer. There are generally four main options for this:
- On-Camera Shotgun Microphone: This the most widely used microphone on YouTube, especially for vloggers, since it mounts on top of the camera, easy to use, forgiving, and highly portable. If your camera is close enough (with 4 feet) to your subjects in your DIY studio, this could be a good option for your microphone. But, if your camera is farther away or you want to eliminate more background noise or room reverb, the next options may suit you better.
- Lavalier (A.K.A. lav or lapel) Microphone: This is a tiny microphone that is typically hidden under a shirt but can often be seen clipped to the top collar of those who are speaking on camera. It’s an easy way to get a microphone within a foot of the mouth to capture great voice and minimize other noises with a small pick up pattern. This is one of the most common microphones for a studio and is less expensive than the next most popular option below.
- Boom Microphone: This is a microphone that is placed on the end of a boom pole to get the microphone as close to the speaker just outside of the frame of the camera. While you could simply attach your on-camera shotgun mic to a boom pole to do this, I have noticed most people purchase fairly expensive ($500-$1,000+) super cardio or compact shotgun mics that look like long skinny cylinders. The sound quality is a step up from a lavalier mic which is why you will often see these being used more frequently on movie sets.
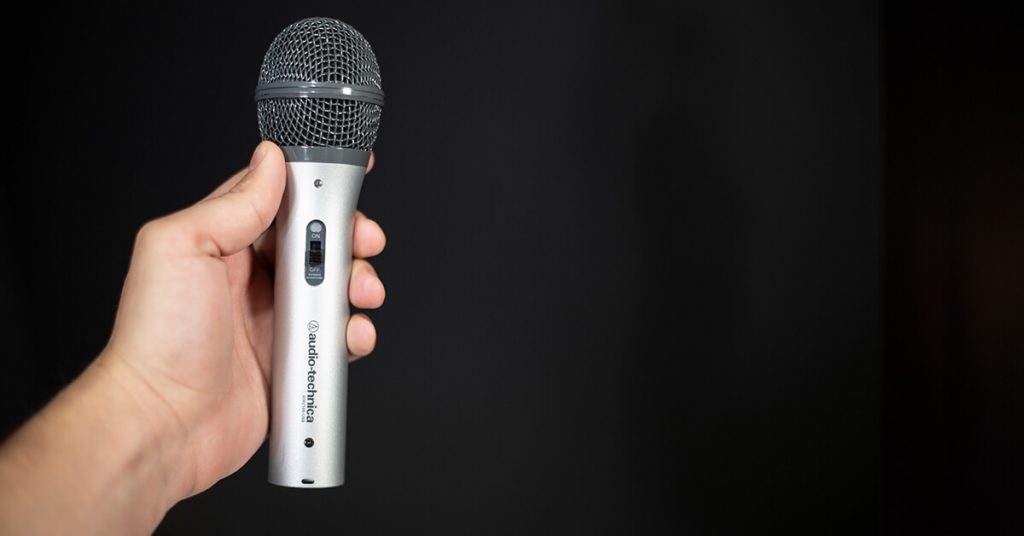
- Hand-held Microphone: While this is a great option for getting quality sound, it can be distracting to have in the frame. Hand-held mics have a small pick up patterns so they need to be held close to the mouth to pick up good audio. This might not be all that bad if the video you are recording is supposed to have more of a talk show or podcast type of look.


You can take a look at my current top recommendations for DIY studio microphones that I use to get great audio (on a budget).
Tripod
Every studio needs a tripod whether you are a one-man show or have a crew. While it is absolutely possible to get handheld shots in a studio (there are times when this is preferable) you will most likely want steady shots for the types of videos a studio can produce.
Get The Audience Growth Checklist 🚀
Your content deserves an audience. Find out how to get the reach it deserves.
The good news is that tripods start at $15 on Amazon, so it’s affordable to get started with one and upgrade as you go to steadier or more travel-friendly tripods. I currently use one travel tripod for everything inside and outside of my studio. It’s very flexible and at a fair price.
Lights
Good lights are generally the difference between shooting video in an empty room and shooting video in a studio. They don’t need to be expensive lights to get the job done but they do need to be brighter and positioned differently than your typical household or office lights. If you think about it, household or office lights are meant to light everything around you and be easy on your eyes but studio lights are meant to light only what your camera is meant to capture.
You should consider starting with a three point light set up. That means two lights for each side of your subject to light their front (the key and fill lights) and one light from the back corner (a hair light).
There are limitless ways to use different lights to light your subject. I created a page to show you what budget lights I use and what pro gear purchase I wanted to improve my lighting set up. Check this page out to see how I built a light kit from inexpensive items at Walmart and what lights to buy if your budget is a little larger.
Nice-to-Have Studio Equipment
Naturally, there is a ton of equipment that makes shooting video in your DIY studio so much more efficient and that will give your videos a more professional look. Below is a short list of some of the items I have found helpful and that I wish I had to make the process easier.
Sound Dampening
Sound dampening devices could arguably make it into the “needed equipment” list. Setting up a new studio in a small and/or empty room usually creates odd sounding reverberation or echo that makes the room sound unnatural. While a good microphone will go a long way in reducing undesired sounds, they often can’t eliminate the rooms reverb/echo. The solution to this is sound dampening devices to absorb or break up the sound waves to create a more natural sound.
Here is a quick list of sound dampening devices you can find or buy to modify your studio’s acoustics:
- Bookshelves: A wall full of odd sized books is a great way to break up and scatter sound waves for a more natural sound.
- Studio foam wedges: Well placed studio quality foam wedges can absorb sound in the primary locations they are reflecting off of surfaces.
- Acoustic Sound Panels: Acoustic panels can come in a variety of materials, but are generally canvas covered frames stuff with different sound absorbing materials. These are more expensive than foam wedges but are more durable and attractive.
- Hanging Think Blankets: Hanging a thick moving blanket on a wall can also absorb a fair amount of sound.
- Door and Window Weather Strips: Using weather strips to seal the windows or doors (whether interior or exterior) can keep outside sound from leaking into your studio.

I will write more blog posts in the future about room acoustics, sound proofing, and sound dampening and link them back here if you want to learn more.
Video Monitor
A video monitor is simply a larger screen that displays the video feed your camera is capturing. After shooting alone and going back and forth between my desk and camera to ensure I was in frame and in focus, I finally broke down and purchased a 7″ video monitor so I could see what I was doing without having to get up. While could technically see my camera’s articulating screen, it was too small to be useful from six feet away.
Even if you are not shooting alone, a video monitor can be helpful to pick up on the extra details that are lost on the small screen on the back of the camera. This item is certainly a “nice-to-have” item, but it’s one that you will wonder how you lived without once you have one.
Camera Remote
If you are often recording yourself alone in your studio adding an inexpensive camera remote to your studio gear can also make recording a much simpler process. With a remote you can start and stop the recording without leaving your position.
Audio Recorder
Just because your camera can record audio, doesn’t mean that it is good at it. Audio recording is a complex process in itself and some cameras are better at it than others. Adding an audio recorder to your studio makes it possible to capture higher quality audio and split the audio into multiple channels to isolate in the editing process. That means you can record two people on their own channels to having greater control of their dialog later in the post-production process.
Camera & Light Mounts
You may want to record with multiple camera’s or add a variety of lights in odd places around the room. If you have ever wondered if you could mount a light or camera to this or that, chances are somebody has already done it and created a special mount just for that situation.
Do you want to mount a light to the ceiling? There’s a mount for that.
Do you want to mount your camera to a random pole in the room? There’s a mount for that.
What about mounting a light to your office drop ceiling? Yes, there’s a special mount for that too.
All of these specialty mounts to secure camera’s and lights to odd places are only a Google search away.
Dimmer Switches
Dimmer switches are an inexpensive tool you can pick up at your local home depot to have more control of your lights. You could buy lightbulbs with different degrees of lumens (brightness) or you can control their brightness individually with dimmer switches to make your lighting perfect.
Color Gels
To bounce some color on the backdrop or add a little drama to your subject, you can add color gels to your lights. You can purchase packs of colors on Amazon to add to your light kit. Be careful to only mount them on cool LED lights though. Putting any of these gels on hot lights will warp or melt these plastic sheets.

Backdrops
A backdrop is what is behind your subject in your studio. It can be as simple as an empty wall or complex as a custom set design. Here are some examples of what you can use for a backdrop:
- An existing blank wall: The easiest and most boring option.
- A paper roll kit: You can buy different colors of paper to hang behind your subject. It’s affordable and easy to change out.
- Printed backdrop: Some people opt to have a scene printed in a large image behind them.
- Green screen: This backdrop gives you the flexibility to put any background behind you. You will need to have great lights and a fairly competent camera to do this well.
- Take advantage of existing room decor: If you have a great room in mind that can double as a studio, your backdrop is already taken care of.
- Custom set: You can buy and arrange furniture and decor to make your own set. See more on this below.

You will want to consider whether you want to build a permanent solution or make it easy to change out the back drop for a variety of different kinds of videos.
Set Furniture & Decor
Unless you are building your studio around an ideal location, you will likely want to dress up the background a little for your studio videos. You can keep it simple with a few lights or decorate a whole room to set a specific mood. Set furniture could include chairs, tables, bookshelves, lights, fun objects, photos, painting, and other wall decor.
I wrote a whole post on design ideas for your studio to give you some inspiration on what could be and another post on how to utilize IKEA to build out your DIY studio that could help you with your set design.
Extra Lights
It seems like you can never have enough lights in a studio or types of lights. This is especially true if you have a multipurpose studio where the subject or theme of the videos changes frequently. Having extra lights, light mounts, and gels are always nice to have in any studio. So as you invest in your lights, just know that you are building on a collection that will be usefully for a long time.
Related Questions
Where should I purchase the gear mentioned above? I purchase most of my gear from Amazon or bhphotovideo.com. You can also find more items than you would think at IKEA.
What brands should I consider or avoid with media gear? There are such a wide variety of brands out there and there are new ones popping up every week. I find the new companies can produce equipment that is just as good or better than established brands or established brands that produce a particular item that is no good. You generally have to research each item independent of brand.
Should I start with amateur, prosumer, or professional gear? I would start with the best camera and lens you can afford. All the amateur gear of everything else mentioned above works fine to start and allows you to build up slowly. The one exception is the microphone. The difference between a $50 mic and a $200 mic is fairly steep, so I would spend a little more on that one item.


